Pre-Sprout Sugar Snap Peas for a Stress-Free Spring Garden
As the last vestiges of winter fade and the promise of warmer days fills the air, gardeners everywhere feel that familiar tug – it's time to plan for spring! And for many, no spring garden is complete without the delightful crunch and sweet flavor of homegrown sugar snap peas. These vibrant legumes are a true harbinger of spring, offering both delicious harvests and a burst of green beauty to your plot. This year, make **planting sugar snap peas for spring** an even more rewarding and worry-free experience by embracing a simple yet powerful technique: pre-sprouting. Imagine knowing, with near certainty, that every precious seed you sow will emerge from the soil. That's the magic of pre-sprouting. It takes the guesswork out of germination, giving your sugar snap pea plants a significant head start and ensuring a robust, productive season. Say goodbye to the anxiety of wondering if your seeds are rotting beneath the earth and hello to the joyful anticipation of vigorous growth.Why Pre-Sprout? The Stress-Free Advantage for Your Spring Peas
The decision to pre-sprout your sugar snap peas isn't just about getting a jump on the season; it's about building confidence and reducing common gardening frustrations. When you pre-sprout, you're not merely accelerating growth; you're conducting a mini-experiment to ensure viability before committing your seeds to the soil.Here’s why pre-sprouting is a game-changer for **planting sugar snap peas for spring**:
- Visual Confirmation of Viability: The most significant benefit is the ability to *see* that your seeds are alive and ready to grow. If a seed doesn't sprout during this process, you know it's unlikely to do so in the ground, allowing you to discard it and plant a viable one instead. This dramatically improves your germination rates.
- Faster Emergence: Seeds that have already begun to sprout in a controlled environment will pop through the soil much quicker once planted. This reduces the time they are vulnerable to pests, diseases, or unfavorable soil conditions, leading to stronger, healthier seedlings.
- Reduced Risk of Rot: Unsprouted seeds sitting in cold, damp soil are prone to rotting before they can germinate. By pre-sprouting, you ensure the seed has already initiated its growth process, making it less susceptible to rot once it encounters garden soil.
- Optimized Spacing: Knowing which seeds are viable allows for more precise planting. Instead of over-sowing and then thinning (which can disturb the roots of adjacent plants), you can plant pre-sprouted seeds at their ideal spacing from the start.
- A Sense of Control and Joy: There's an undeniable satisfaction in watching tiny roots and shoots emerge. This early success builds enthusiasm for the gardening season and minimizes the initial "waiting game" anxiety.
How to Pre-Sprout Your Sugar Snap Peas: A Simple Step-by-Step Guide
Pre-sprouting sugar snap peas is surprisingly simple and requires minimal supplies. Typically, you'll want to start this process about a week before you plan to transplant them into your garden.- Soak Your Seeds: Begin by soaking your sugar snap pea seeds in lukewarm water for 12-24 hours. This softens the hard seed coat and kick-starts the germination process by allowing water to penetrate more easily. Don't soak for much longer than 24 hours, as this can drown the seeds.
- Prepare a Moist Environment: After soaking, drain the water. Take a damp (not soaking wet) paper towel and lay your seeds out on it, leaving a little space between each one. You can fold the paper towel over the seeds or use another damp paper towel on top.
- Seal Them Up: Place the damp paper towel with the seeds inside a plastic resealable bag or a covered container. This creates a humid, consistent environment ideal for germination.
- Find a Warm Spot: Place the bag or container in a warm location, ideally between 65-75°F (18-24°C). Avoid direct sunlight, which can dry out the paper towel too quickly.
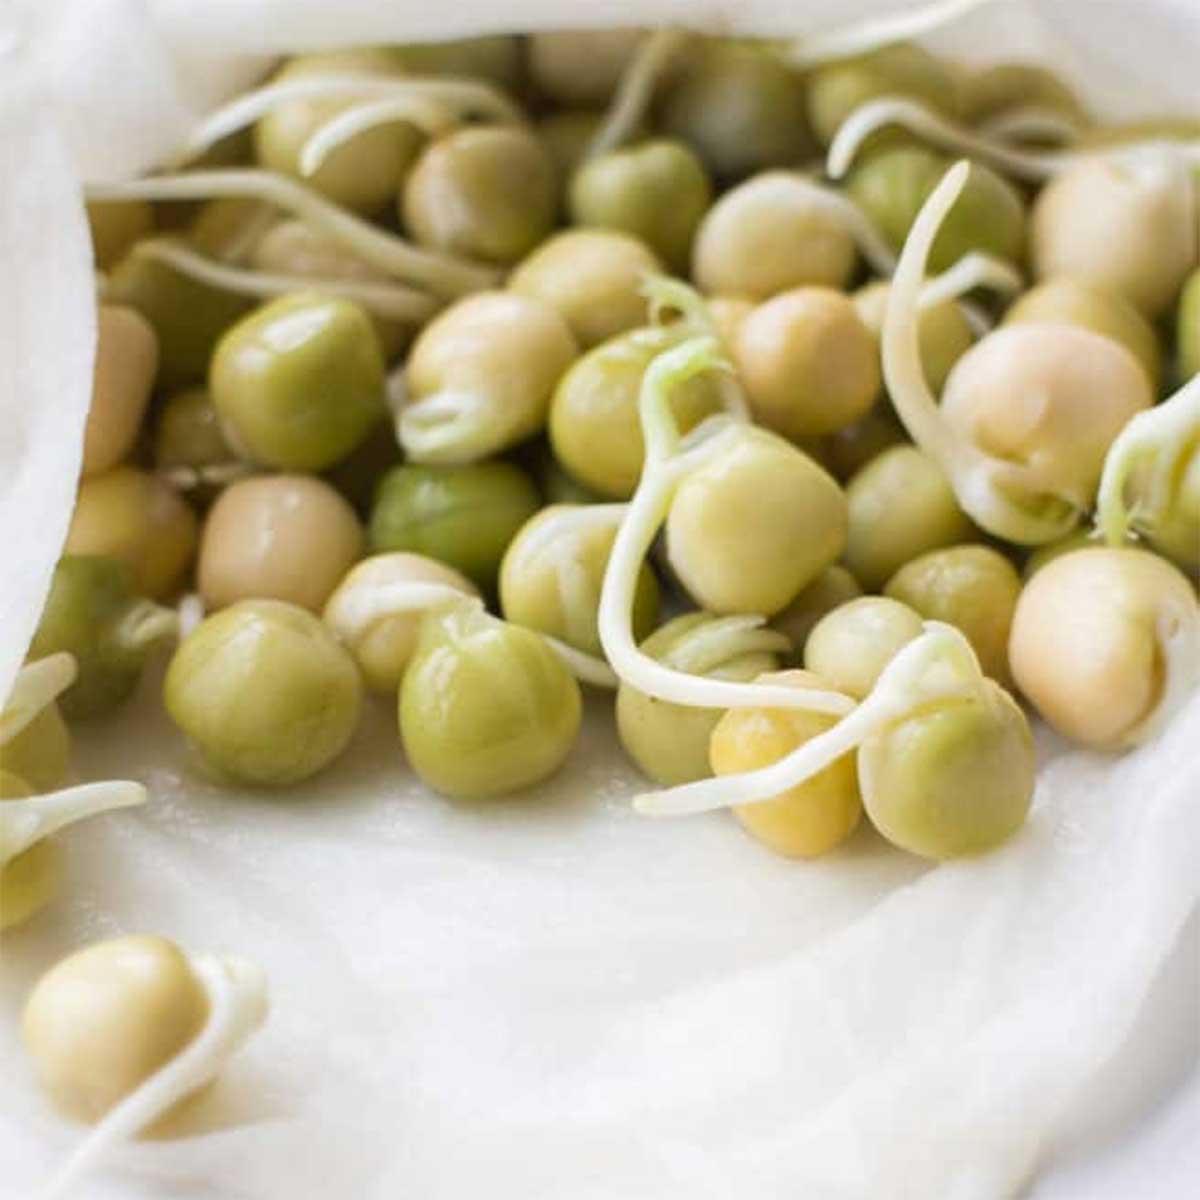
- Monitor and Wait: Check your seeds daily. Within 3-7 days, you should start to see small white rootlets (radicles) emerging from the seeds. Some might even show tiny green shoots. Once the root is about 1/4 to 1/2 inch long, they are ready for planting.
- Handle with Care: Once sprouted, the seeds are delicate. Handle them gently to avoid damaging the tender roots and shoots.
This process transforms opaque seeds into miniature plants bursting with life, ready for their journey into the garden. It truly takes the stress out of **planting sugar snap peas for spring**!
Preparing Your Garden Beds for Abundant Sugar Snap Peas
With your pre-sprouted peas eagerly awaiting their new home, it’s time to ensure their garden beds are perfectly prepared for a season of vigorous growth and abundant harvests. Sugar snap peas thrive in well-draining soil and appreciate a sunny location.Here’s how to set your garden up for success:
- Choose the Right Spot: Select a location that receives at least 6-8 hours of direct sunlight per day. Peas are climbing plants, so consider proximity to a fence, trellis, or other support structure.
- Amend Your Soil: Sugar snap peas prefer slightly acidic to neutral soil (pH 6.0-7.0). They also benefit greatly from rich, loose soil. Incorporate a good amount of organic matter, such as compost or well-rotted manure, into your garden beds. This improves drainage, aeration, and nutrient content, providing an ideal environment for root development.
- Consider Raised Beds: If your native soil is heavy clay or very sandy, raised beds (like the 4x4 boxes mentioned in our reference) are an excellent option for ensuring optimal soil conditions and drainage.
- Introduce Seed Inoculant: This is a crucial step for legumes like sugar snap peas. Before planting, gently mix your pre-sprouted peas with a pea and bean inoculant. This beneficial bacterium encourages nitrogen fixation in the plant's roots, which means the peas can draw nitrogen directly from the air. The result? Bigger, healthier plants and significantly higher yields. It's a small investment that pays off immensely in terms of harvest size.
Ensuring your soil is rich and ready is just as important as the quality of your seeds when **planting sugar snap peas for spring**.
Planting Your Pre-Sprouted Peas: From Bag to Bed
You have a few options for planting:
- Trench Method: For planting along a fence or trellis, dig a shallow trench about 1-2 inches deep. Gently place your pre-sprouted peas in the trench, spacing them about 2-3 inches apart. This method is efficient for creating a dense row of plants that will quickly fill out their support structure.
- Individual Holes: For more precise spacing or in a grid pattern (like planting 7x7 in a 4x4 raised bed), poke individual holes about 1 inch deep and 3-4 inches apart. Carefully drop one pre-sprouted pea into each hole.
Once planted, gently cover the peas with soil, being careful not to bury them too deeply – about 1/2 to 1 inch of soil cover is sufficient. Lightly press down on the soil with your hands to ensure good seed-to-soil contact, and then give them a gentle sprinkle of water. This initial watering helps settle the soil around the delicate roots.
Now, the waiting game begins. But thanks to pre-sprouting, this wait is much shorter and less anxiety-inducing. You can expect to see the first green shoots emerge from the soil in just a few days to a week. The excitement of seeing that first tiny plant break through the surface is unparalleled, and you'll quickly find yourself running to the garden daily to witness the magic unfold!
For more detailed planting guidance and to ensure your sugar snap peas thrive, you might find our article on Grow Delicious Sugar Snap Peas This Spring: 3 Easy Steps particularly helpful.
